
Post by summer201016 on Jul 8, 2013 21:51:26 GMT -5
Learn how torecover missing data with Wondershare Data Recovery for MacAccidental deletion takes place everywhere, which is actually difficult in order to avoid. But the results of accidental deletion can be changed for those who have had a data recovery program. Wondershare Data Recovery for Mac, one of the most desirable data recovery programs for Mac, can readily allow you to restore lost photos, video, documents, emails and archive files from any Mac-based hard drive or external hard drive, iPod, USB drive, SD card, digital camera, cell phone, and MP3/MP4 player, resulting from accidental deleting, formatting, virus infection, improper operation, unexpected power failure, and other unknown reasons.
Acquire Discount code for Wondershare Data Recovery for Mac.
Wondershare Data Recovery for Mac has involved five recover modes, we shall share you each recovery mode within the following post that may help you recover your files per your circumstances.
1st, install and run this Mac data recovery on your pc, and you’ll acquire the interface as follow.
Keep it planned: don't do the installation on the disk the place you lost important computer data, in case you overwrite it.
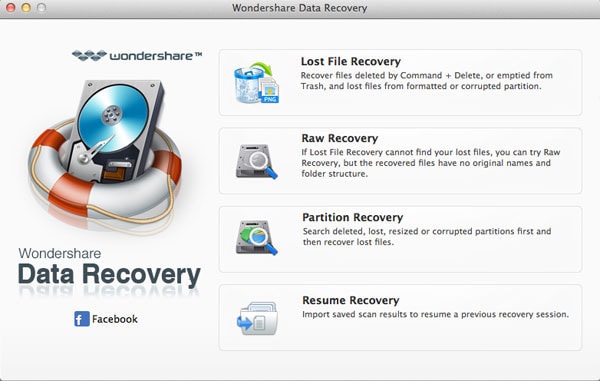
Lost File Recovery
After hitting the "Lost File Recovery", you'll acquire the interface as follow:
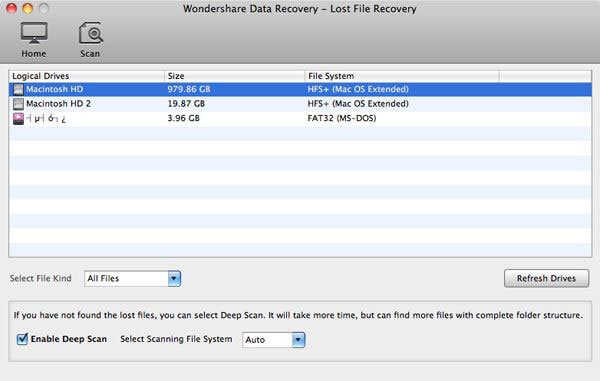
Here, you'll be able to choose a logical drive where you lost your files, and clickthe "Scan" to search it.
Note: You may "Enable Deep Scan" to retrieve files lost from the formatted disk.
Soon after the scan, you can preview and recover the files you'll need. Examine the file and click to "Recover".
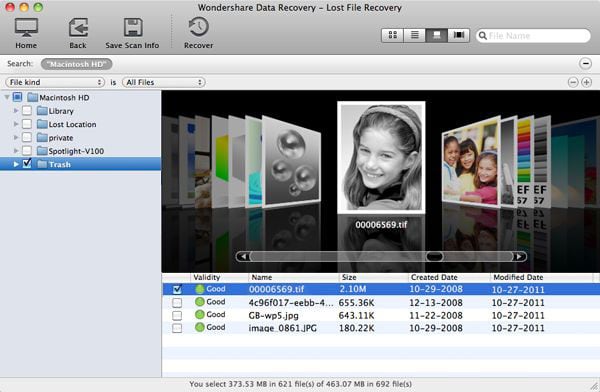
Note:
1. You may examine photos, documents, emails, aspects of videos and audio recordings.
2. It's also possible to check the file validity before recovery.
Raw Recovery
After clicking the "Raw Recovery", you'll have the interface as follow:
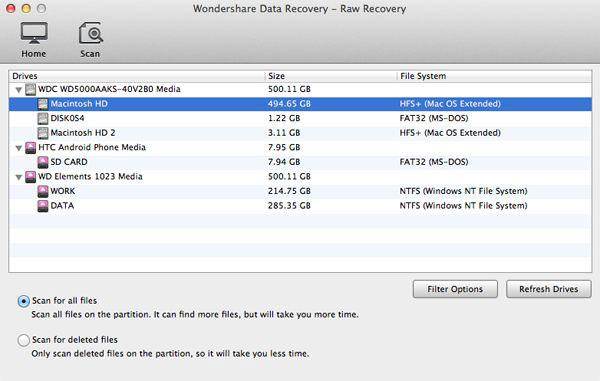
Decide upon a drive you want to recoup files from colliding with on the "Scan" to discover lost files.Prior to scanning, you'll be able to choose to scan all files or only scan for lost files to avoid wasting time for the interface bottom.
In addition, you can set specific file types to scan with the File Filter, for example photos, videos, documents, and so forth. the specified file formats.
When the scan is done, check the files you wish to get better.

Partition Recovery
Soon after pressing the "Partition Recovery", you'll get the interface as follow:
Choose the disk from which you lost partitions, and start to scan.
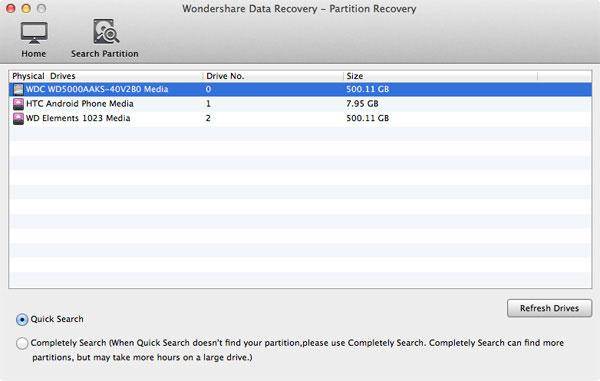
You can choose to make use of "Quickly Search", which may find your recently lost partitions within seconds, or "Completely Search" which could find all lost partitions and takes more time.
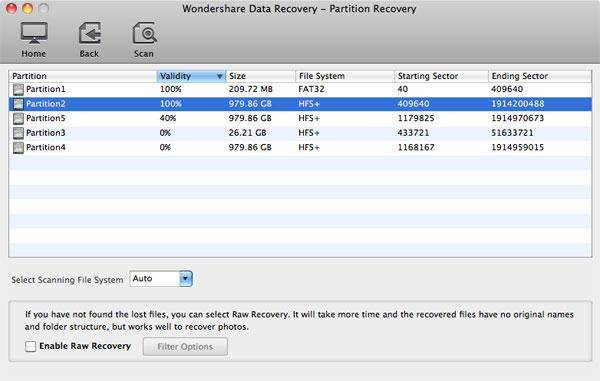
When lost partitions tend to be found, opt for a partition that you would like to get better, and attempt to scan the contents on it for recovery.
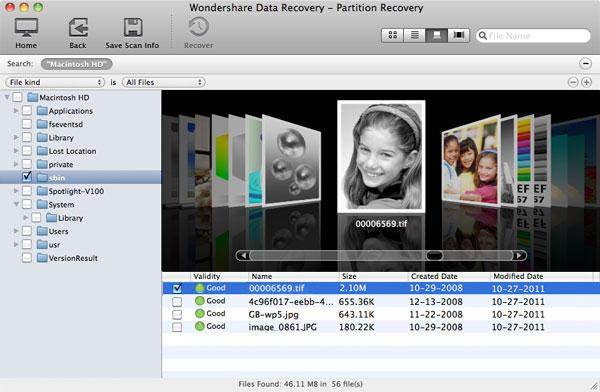
Then preview and check the files you need to carry out the recovery.
iPhone Recovery from iTunes[/b]
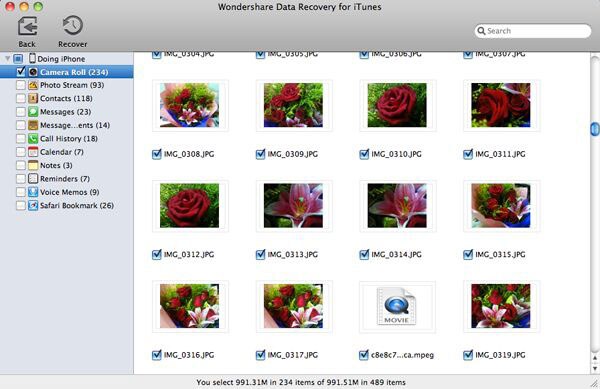
After clicking on the "iPhone Recovery from iTunes", you'll acquire the interface as follow:
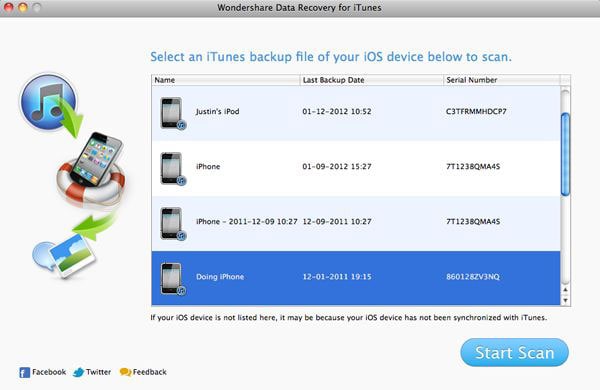
The backup files of your iDevice are all found and displayed. Opt for the device where you lost your files and continue to scan. If there is a couple of backup for the same device, please pick out the recent one good date.
After the scan, all the contents are found and can be previewed in original quality. Examine the file box and click on to "Recover" them all.
Resume Recovery[/b]
Press on the "Resume Recovery" to import the saved scanning result file.
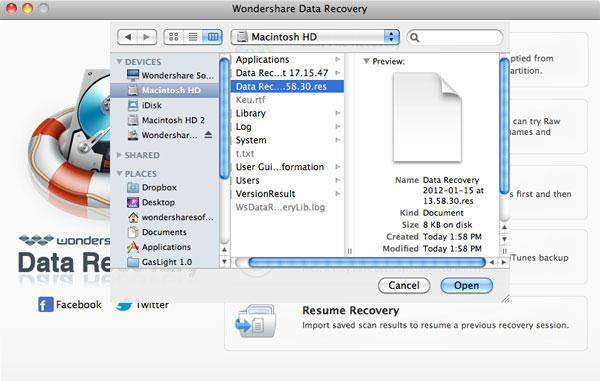
Then you are able to right preview and view to restore the file you desire.
Acquire Discount code for Wondershare Data Recovery for Mac.
Wondershare Data Recovery for Mac has involved five recover modes, we shall share you each recovery mode within the following post that may help you recover your files per your circumstances.
1st, install and run this Mac data recovery on your pc, and you’ll acquire the interface as follow.
Keep it planned: don't do the installation on the disk the place you lost important computer data, in case you overwrite it.
Lost File Recovery
After hitting the "Lost File Recovery", you'll acquire the interface as follow:
Here, you'll be able to choose a logical drive where you lost your files, and clickthe "Scan" to search it.
Note: You may "Enable Deep Scan" to retrieve files lost from the formatted disk.
Soon after the scan, you can preview and recover the files you'll need. Examine the file and click to "Recover".
Note:
1. You may examine photos, documents, emails, aspects of videos and audio recordings.
2. It's also possible to check the file validity before recovery.
Raw Recovery
After clicking the "Raw Recovery", you'll have the interface as follow:
Decide upon a drive you want to recoup files from colliding with on the "Scan" to discover lost files.Prior to scanning, you'll be able to choose to scan all files or only scan for lost files to avoid wasting time for the interface bottom.
In addition, you can set specific file types to scan with the File Filter, for example photos, videos, documents, and so forth. the specified file formats.
When the scan is done, check the files you wish to get better.
Partition Recovery
Soon after pressing the "Partition Recovery", you'll get the interface as follow:
Choose the disk from which you lost partitions, and start to scan.
You can choose to make use of "Quickly Search", which may find your recently lost partitions within seconds, or "Completely Search" which could find all lost partitions and takes more time.
When lost partitions tend to be found, opt for a partition that you would like to get better, and attempt to scan the contents on it for recovery.
Then preview and check the files you need to carry out the recovery.
iPhone Recovery from iTunes[/b]
After clicking on the "iPhone Recovery from iTunes", you'll acquire the interface as follow:
The backup files of your iDevice are all found and displayed. Opt for the device where you lost your files and continue to scan. If there is a couple of backup for the same device, please pick out the recent one good date.
After the scan, all the contents are found and can be previewed in original quality. Examine the file box and click on to "Recover" them all.
Resume Recovery[/b]
Press on the "Resume Recovery" to import the saved scanning result file.
Then you are able to right preview and view to restore the file you desire.